
Table of Contents
Introduction: Japanese-Style Deep Fried Chicken Tempura
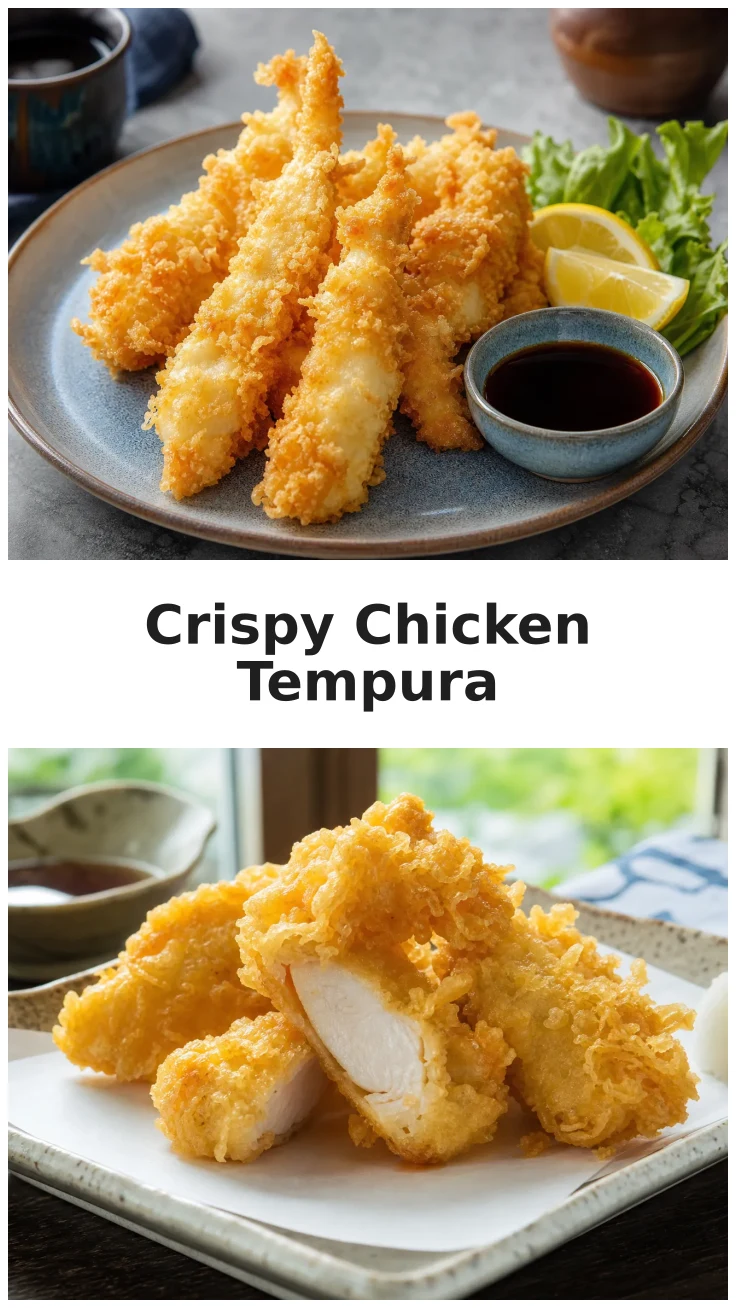
Japanese-Style Deep Fried Chicken Tempura offers a delightful twist on traditional fried chicken, blending light, crispy batter with juicy chicken pieces. This dish is perfect for those who love the delicate flavors and textures of Japanese cuisine.
Whether you’re planning a family dinner or a festive gathering, this recipe will guide you through creating a meal that impresses with both taste and presentation. Let’s dive into the world of tempura and explore its unique qualities.
What Makes Chicken Tempura Unique?
Chicken tempura stands out due to its light and airy batter, which is achieved by using cold water and minimal mixing. The result is a crispy coating that enhances the natural flavor of the chicken without overpowering it.
The Origins of Tempura
Tempura has its roots in 16th-century Japan, influenced by Portuguese missionaries who introduced batter-frying techniques. Over time, it evolved into the iconic Japanese dish we know today, celebrated for its simplicity and elegance.
Why You’ll Love This Recipe
This recipe is beloved for its ease and versatility. The ingredients are simple, and the steps are straightforward, making it accessible for cooks of all experience levels. Plus, the crispy texture and savory taste are sure to be a hit with anyone who tries it.

Love easy chicken dinners like this? 🍗
Get new chicken recipes, comfort food and family dinner ideas in your inbox every week. Free, no spam, unsubscribe anytime. See our Privacy Policy.
Ingredients
Essential Ingredients for Tempura Batter
The key to a perfect tempura batter lies in its simplicity. You’ll need all-purpose flour, cornstarch, baking soda, and ice-cold water. These ingredients come together to create a batter that crisps up beautifully when fried.
Choosing the Right Chicken
Opt for boneless, skinless chicken breasts or thighs. Both cuts are tender and absorb flavors well. Cutting the chicken into uniform pieces ensures even cooking, resulting in juicy, flavorful bites.
Optional Add-ins and Variations
Spice up your tempura with seasonings like garlic powder and paprika, or add a pinch of cayenne for heat. You can also experiment with different dipping sauces to complement the chicken’s flavor.
Step-by-Step Instructions
Preparing the Chicken
Begin by slicing the chicken into bite-sized pieces. Season with salt and pepper, then set aside to marinate while you prepare the batter.
Making the Tempura Batter
In a mixing bowl, combine the flour, cornstarch, and baking soda. Gradually add ice-cold water, stirring gently to avoid overmixing. The batter should be slightly lumpy.
Frying to Perfection
Heat oil in a deep fryer or large pot to 350°F. Dip each piece of chicken into the batter, allowing excess to drip off, and carefully place in the hot oil. Fry until golden brown and crispy, about 3-5 minutes per side.
Pro Tips
Mastering deep-fried chicken tempura requires some insider knowledge. Here are some tips to help you achieve the best results.
- Ensure your batter remains cold by placing it over a bowl of ice or refrigerating it between batches.
- Avoid overcrowding the fryer, as this will lower the oil’s temperature and result in soggy tempura.
- Use a thermometer to maintain a consistent oil temperature of 350°F for optimal frying.
- Rest the fried chicken on a wire rack instead of paper towels to prevent sogginess.
One of the most crucial tips is to keep the batter cold. This ensures the outer coating is crispy while the chicken remains juicy and tender. For more frying tips, check out Crispy Pan Fried Chicken Dumplings.
Love easy chicken dinners like this? 🍗
Get new chicken recipes, comfort food and family dinner ideas in your inbox every week. Free, no spam, unsubscribe anytime. See our Privacy Policy.
Serving Suggestions
Pairing with Dipping Sauces
Tempura is traditionally served with a light soy-based dipping sauce. You can also try other options like sweet chili sauce, spicy mayo, or a tangy teriyaki glaze to complement the crispy chicken.
Side Dishes to Complement
Serve your chicken tempura with a side of steamed rice or a fresh cucumber salad. These options provide a refreshing contrast to the rich flavors of the tempura.
Nutritional Information
Caloric Breakdown
Each serving of chicken tempura is approximately 280 calories, with a balance of proteins, carbohydrates, and fats. It’s a satisfying dish that doesn’t compromise on flavor or texture.
Nutritional Benefits
While fried, chicken tempura offers protein from the chicken and some vitamins and minerals from the batter ingredients. For a lighter alternative, consider trying a Fried Chicken Air Fryer method to reduce oil usage.

Crispy Deep Fried Chicken Tempura

Equipment
- 1 deep fryer or large pot
- 1 Mixing bowl medium
- 1 wire rack
Ingredients
Tempura Batter
- 1 cup all-purpose flour
- 1/4 cup cornstarch
- 1 teaspoon baking soda
- 1 cup cold water
Chicken
- 1 pound boneless skinless chicken breasts or thighs, cut into bite-sized pieces
- Salt and pepper to taste
Frying
- Vegetable oil for frying
Instructions
Preparation
- Cut the chicken into bite-sized pieces. Season with salt and pepper. Set aside.
- In a medium mixing bowl, combine flour, cornstarch, and baking soda. Gradually add cold water, stirring gently to avoid overmixing. The batter should remain slightly lumpy.
Frying
- Heat vegetable oil in a deep fryer or large pot to 350°F. Ensure there is enough oil for the chicken to be fully submerged.
- Dip each piece of chicken into the batter, allowing excess to drip off. Fry in batches, ensuring not to overcrowd the fryer. Cook until golden brown and crispy, approximately 3-5 minutes per side.
Serving
- Transfer fried chicken to a wire rack to drain excess oil. Serve hot with your choice of dipping sauces.
Storage
- Store any leftovers in an airtight container in the refrigerator for up to 2 days. Reheat in a preheated oven at 350°F until warmed through.
Notes
Ingredient Substitutions: You can use chicken thighs for a juicier texture. For a gluten-free option, substitute all-purpose flour with rice flour.
How to Serve: Pair with a traditional soy-based tempura dipping sauce or try a spicy mayo for a modern twist.
Storage & Freshness: Best eaten fresh. If storing, let cool completely before refrigerating in an airtight container.
Make-Ahead Tips: The batter can be prepared in advance and refrigerated for up to 4 hours. Stir gently before use.
FAQ
Can I make chicken tempura in advance?
While chicken tempura is best enjoyed fresh for its crispiness, you can prepare the batter in advance and keep it refrigerated for a few hours. Fry the chicken just before serving to ensure it retains its delightful texture. If you must store leftovers, reheat them in an oven to restore some of the crispiness.
What dipping sauces pair well with chicken tempura?
Traditional soy-based tempura sauce is a classic choice for pairing with chicken tempura. You can also explore other options such as spicy mayo, sweet chili sauce, or even a tangy teriyaki glaze. These sauces complement the light batter and juicy chicken, enhancing the overall flavor experience.
Enjoyed this recipe? Leave a review!
There are no reviews yet. Be the first one to write one.